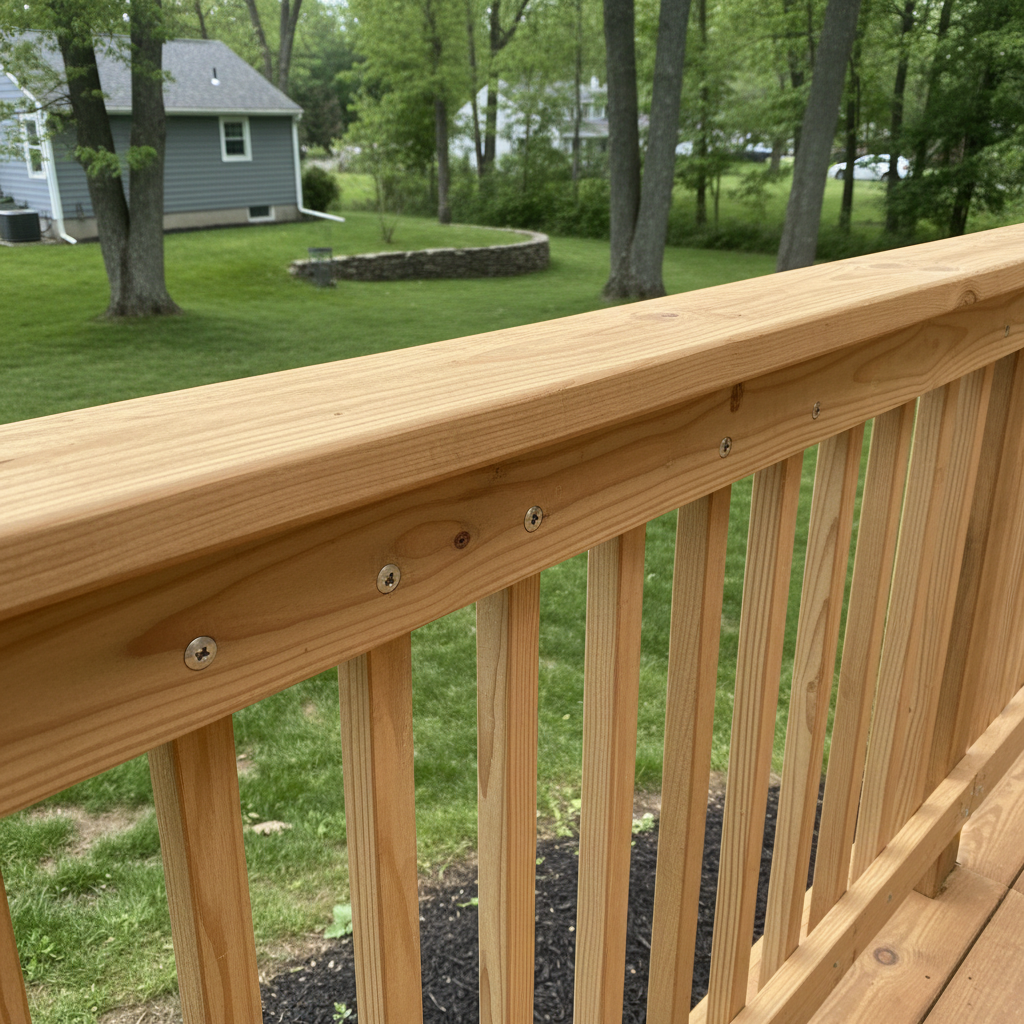
Alright, so you've got a deck, or maybe you're building one, and now it's time to think about railings. This isn't just about how things look; it's about safety, plain and simple. I see a lot of folks here in North Attleborough, especially around the older homes near the town center, wanting to update their deck railings. Some try to DIY it, and that's great if you truly know what you're doing. But there are some really important things you need to understand before you even buy materials, believe me.
Before You Start: The Critical Prep Work
First off, you absolutely need to know your local building codes. Seriously, this isn't something you can skip. In Massachusetts, and right here in North Attleborough, there are specific requirements for railing height, the space between balusters (those vertical posts), and how much force your railing needs to handle. Generally, residential deck railings need to be at least 36 inches high, and balusters can't have gaps wider than 4 inches. You also need to make sure your posts are strong enough to take lateral loads – basically, someone leaning against them or falling into them. Don't just guess on this; check with the North Attleborough building department or look up the MA State Building Code.
Next, take a good look at your existing deck structure. Is it solid? Railings put a lot of stress on the deck frame, especially the rim joists and posts. If your deck is old or shows signs of rot, particularly where the posts attach, you might be creating a bigger problem for yourself. You'll need to inspect the ledger board, joists, and support posts. If anything looks sketchy, you're not just installing a railing; you're doing a deck repair first. And if you're not comfortable assessing structural integrity, that's definitely the time to call in a pro.
Finally, pick your materials. Wood is classic, sure, but it needs maintenance. Composite or PVC railings are low-maintenance but can be pricier upfront. Aluminum or steel offer sleek looks and great durability. Each material has its own installation quirks, too. For instance, composite railings often have specific attachment methods for posts and infill panels that are totally different from traditional wood construction.
During Installation: Where DIY Gets Tricky
Okay, you've got your codes, you've checked your deck, and you've got your materials. Now for the actual work. Here's where most DIYers either shine or, well, get into trouble.
- Post Placement & Attachment: This is the absolute most important step, hands down. Your railing posts are the backbone. They need to be securely fastened to the deck's frame, not just the decking boards. I've seen too many railings that wobble because the posts were surface-mounted with a few screws into thin decking. You typically want to bolt them directly to the rim joist, often with blocking inside the frame for extra support. Some systems use post sleeves over structural posts, which is fine, but the structural post still needs to be rock solid.
- Level & Plumb: Sounds obvious, right? But getting everything perfectly level and plumb (vertically straight) is harder than it looks, especially on a large deck. Take your time. Use a good level, a string line, and a square. Small errors here compound quickly and will make your whole railing look crooked.
- Baluster Spacing: Remember that 4-inch rule? You need to measure carefully. Don't just eyeball it. Use a spacer block or a tape measure to ensure consistent gaps. This isn't just for code; it makes the railing look professional.
- Top Rail Installation: The top rail ties everything together. It needs to be strong enough to resist force and smooth enough for comfort. Make sure all connections are tight and secure.
When should you call a pro during installation? If you're struggling with getting posts truly secure, if you're dealing with complex angles or stairs, or if you're just not confident in your ability to meet those load requirements. Stairs, in particular, are tricky because the railing needs to follow the slope perfectly and maintain consistent height above the nosing of each step.
After Installation: Maintenance & Inspection
So, you've got your new railing up. Great job! But your work isn't quite done. You need to do a thorough inspection.
- Test It: Give the railing a good shake. Lean on it (carefully at first!). Does it feel solid? Any wobbles or creaks? If so, you need to reinforce those weak spots.
- Check Connections: Go around and check every screw, bolt, and fastener. Make sure they're all tight. Over time, wood can expand and contract, loosening things up.
- Maintenance: If you went with wood, you'll need to clean, seal, or stain it regularly. This protects it from our harsh New England weather – those icy winters and humid summers we get here in North Attleborough can really do a number on untreated wood. Composite and vinyl are lower maintenance, but they still need occasional cleaning to prevent mildew and grime buildup.
Even if Oasis Deck Company didn't install your railing, I always recommend homeowners do an annual check-up on their deck and railings. Look for loose fasteners, signs of rot, or any damage. Catching small issues early can prevent bigger, more expensive problems down the road. A safe deck is a happy deck, and a good railing is a huge part of that.